
Total Preparation Time – About 2 Hours
Time Spent Waiting – About 1 Hour
Cooking Time – 8 Minutes Per Batch
I was talking with Lady Di about a fun Halloween Food that can be pretty impressive, if done correctly. Back in October 2000, I remember seeing Martha Stewart making Witch’s Fingers and thought that those would be great party food. The first time making them, they came out awesome and everyone was impressed. So, why not try to recreate the magic.

It was time to dust off the cobwebs in my head and try to recall how they were made. Honestly, they aren’t much more difficult than making soft pretzels. For the purpose of making Witch’s Fingers, we used the same recipe as the Soft Pretzels, which we made a couple of weeks ago. There are a few tweaks to the recipe, which we will cover.
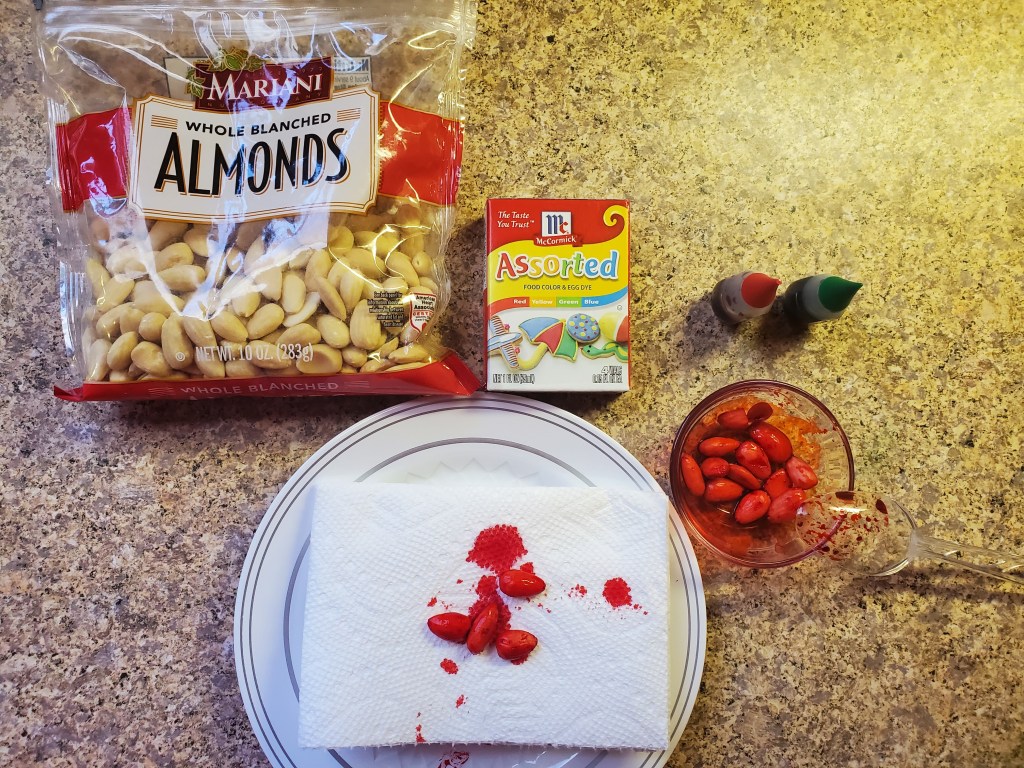
The first change to the recipe is the need for Blanched Almonds and Food Coloring. You will need a small package of blanched almonds. Blanched almonds are almonds that have been immersed in boiling water and had the brown skin removed. They will appear white. When baked, they take on a creepy aging yellow color. The food coloring is the standard food coloring (Red, Yellow, Blue, Green) that you find in the spice section of the grocery store.
Using two small bowls, preferably glass, put 15 – 20 whole almonds in each bowl. Do not use a bowl that might absorb food dye. Make sure the almonds are whole and not broken. Try to make sure that you choose good sized almonds that you can envision as fingernails. Take the Red Food Coloring and put 10 – 15 drops in the bowl. Using a spoon, gently turn over the almonds until completely colored. In the other bowl, do the same with Green Food Coloring. Honestly, you can do any colors that you want, but Red and Green seemed to be sufficiently creepy. Take the almonds and put them on a plate with thickly folded paper towels, to drain and dry. DO NOT USE wet almonds with the pretzels.
While the almonds are drying, prepare the dough, like the Soft Pretzel Recipe calls for. Remember that soft pretzels are a yeast dough and will need the care and time afforded to yeast doughs.
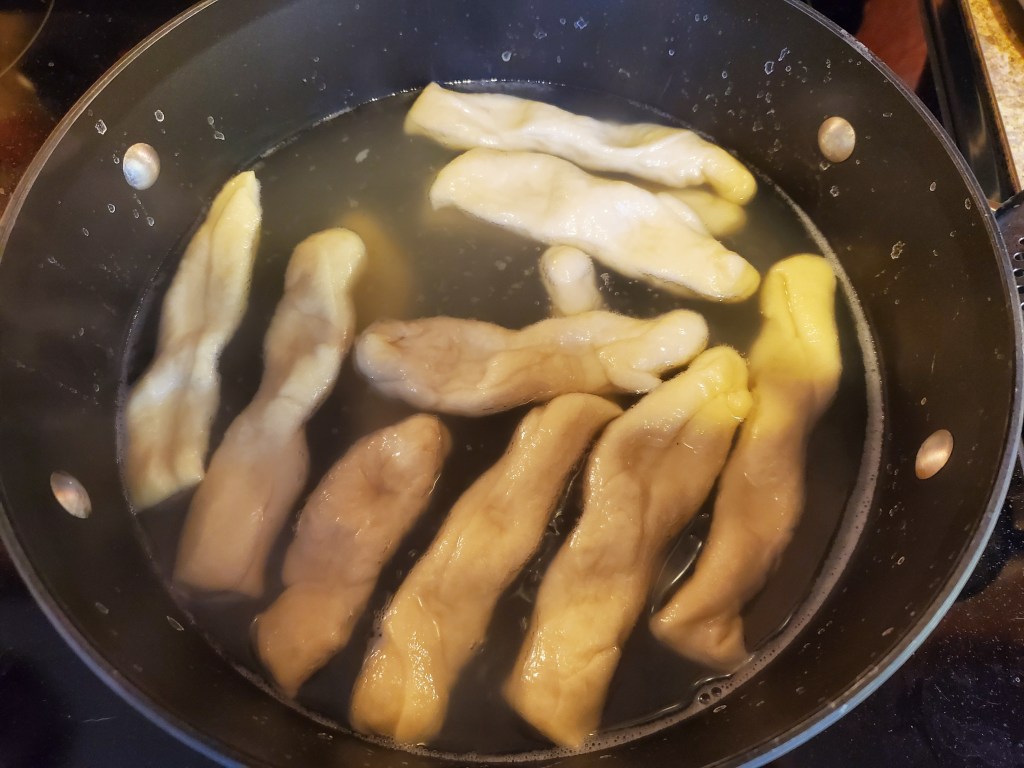
This brings us to our second change to the soft pretzel recipe. As the dough gets close to being doubled in size, take a 6 Quart Pot and fill with 2 quarts of water. Add 2 Tablespoons of Baking Soda. Unlike the Soft Pretzel Recipe, we don’t want the fingers turning dark brown. This is the reason that we are using less Baking Soda than the soft pretzel recipe. Bring the water to a simmer. A roiling boil is too much.

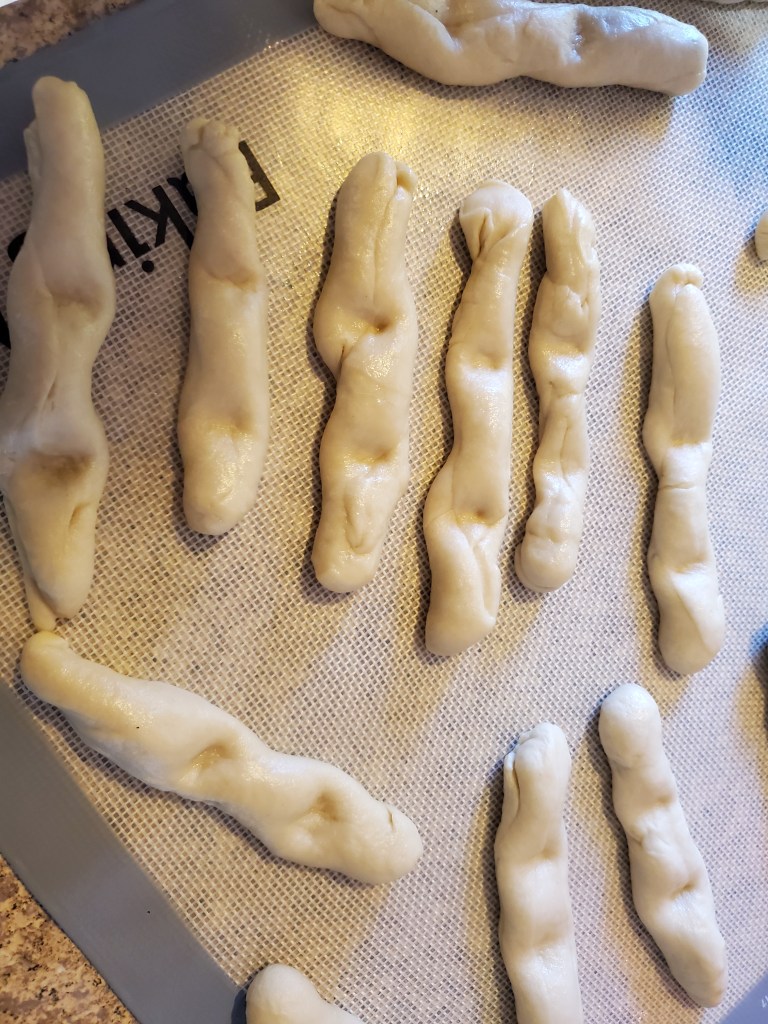
Once the dough has doubled in size, take the dough and turn it out onto your working surface. Using a scraper, cut off small/medium pieces of dough. It’s hard to describe how big a piece needs to be, in terms of dimensions. Maybe try 1 inch by 1 inch by 2 – 3 inches as a guideline. Really, you want different sizes. If it doesn’t look right, you can cut off more dough and reroll it.
With a piece of dough, roll the dough into a snake about ½ to ¾ inches thick. When rolling out dough into a snake, I like to roll the dough between my hands. Others like to roll the dough on a hard surface with the palm of their hand. Use the method that you are most comfortable with.
Once you have a snake that you are happy with, pick an end to be a fingertip. About an inch down, use your index finger and press down firmly, leaving a strong indentation in the snake. Another 1 – 2 inches down from the first indentation, make another indentation. These indentations will be the knuckles of your Witch’s Fingers. By the way, I trimmed the side opposite of the fingernail, so that the finger looked like it was cut off.
This brings us to the third change to the soft pretzel recipe. In the hot water, you will want to give the fingers a bath, about 5 – 10 at a time. Cook the fingers for about 30 seconds on each side. Using a slotted spoon, take the soon to be fingers and put them on a cooling rack covered with paper towels to drain.
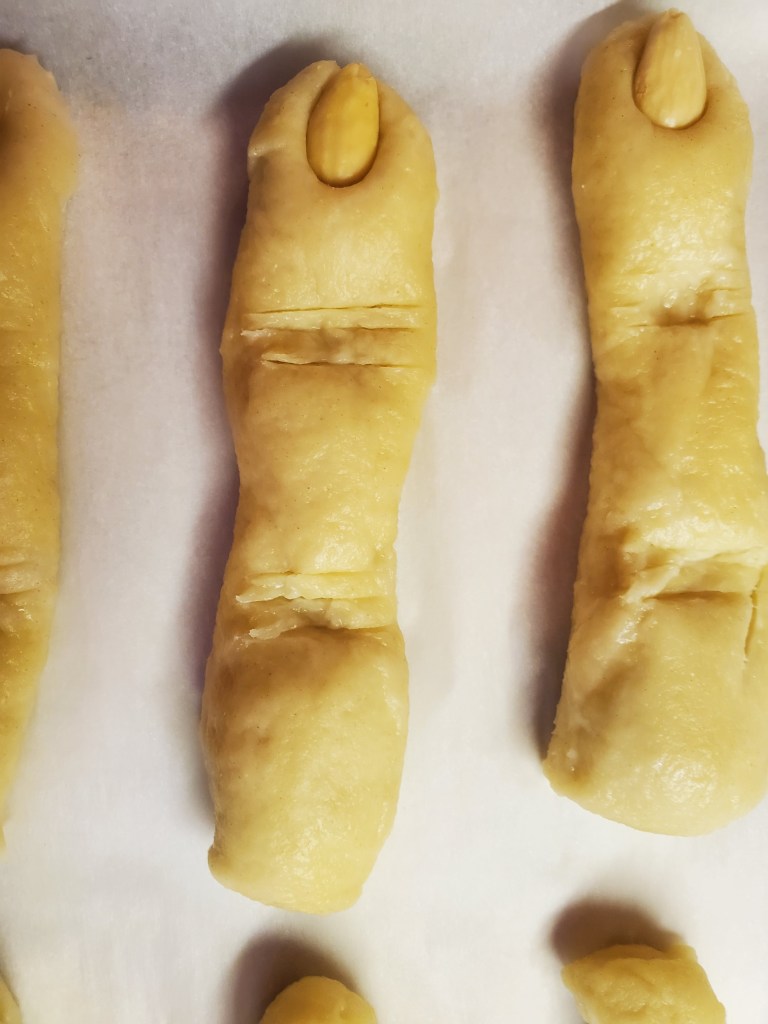
Now is the time for the magic. Identify the side of the finger where the indentation shows the best, and place that side face up. Take an almond and press it into the fingertip. It should be embedded deeply, with the pointy end of the almond facing out from the fingertip. Be sure to mix up colors to get a variety of fingers. Now, at each of the indentations, using a sharp knife, lightly cut/score three lines across the indentations. The cut should just be deep enough to cut through the skin of the finger. Be sure to wipe the knife blade between fingers, because the blade can get gummy.
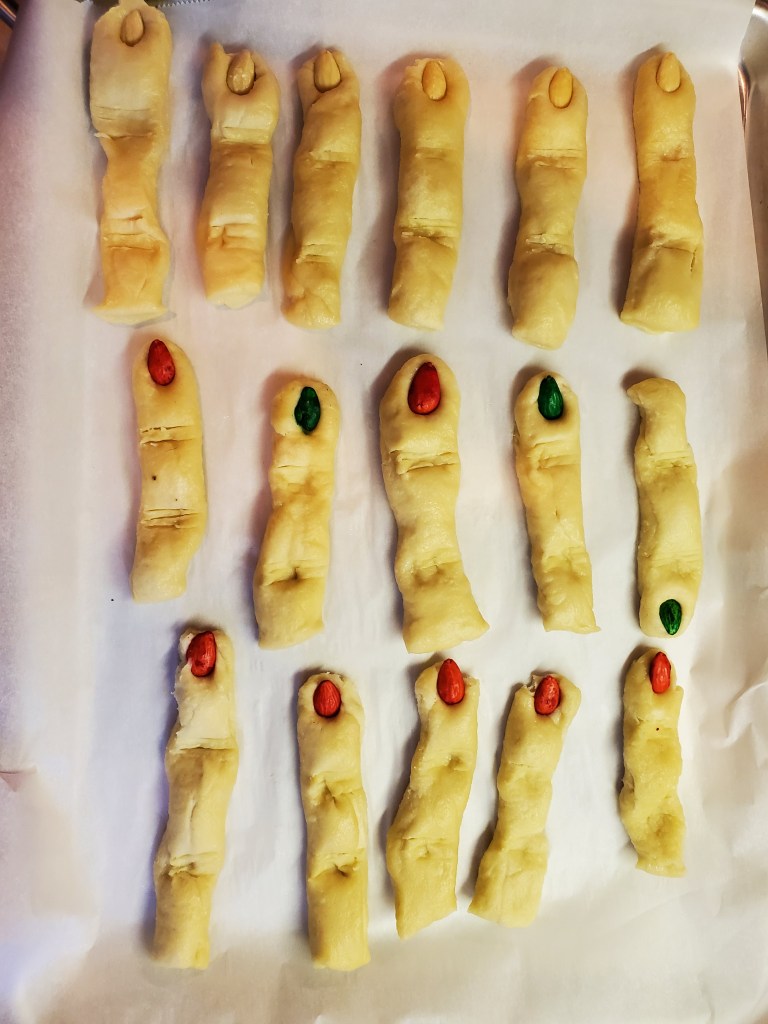
Arrange the fingers on a baking sheet. As always, I like to line my baking sheets with parchment paper. Since I was all about appearances, I didn’t salt or season the fingers before cooking. The fingers cooked for about 8 minutes at 450 degrees Fahrenheit.


No two fingers look the same, and I have to admit that they came out delightfully creepy.
Bon Appetit,
Kappy
