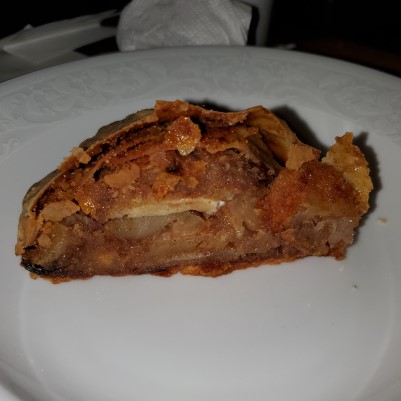
Growing up, I have fond memories of the few times that I had a homemade Apple Strudel. Talking with my father, he remembered his mother and aunts making strudel, which gave me some ideas on how a strudel is made. When done right, to borrow a quote, it’s almost like an apple pie on steroids. And, in a way it is, each bite a little crusty, a little chewy, a little apple, a little cinnamon. Yum.
So, this recipe can be quite a challenge. I think I would give it a 3 star out of 4 on the difficulty scale. I would also plan on setting aside about 3 – 4 hours for the project, inclusive of an hour for letting the dough rest and an hour for baking. Also, I would recommend an apple peeler and corer, because you will need to peel and thinly slice around 3.5 – 4 pounds of apples. Lastly, you need a large work space covered in a fabric tablecloth or bed sheet. The work space should be no less than 3 ft x 4 ft. Yes, you heard me right, assembly of this project needs a large flat solid surface.
Let’s start with the dough. The dough is a really simple, non-yeast dough. I used my KitchenAid with the dough hook to mix the dough. Start by mixing 2 1/2 cups of flour, a teaspoon of sugar, a 1/4 teaspoon of salt. Add in a large egg, a cup of warm water, and a teaspoon of melted shortening (like Crisco). Mix on medium speed for about 2 minutes. The dough should stick to the bottom of the bowl under the dough hook, but should pull away from the sides of the bowl. If the dough isn’t forming into a ball on the hook and looks more like a batter, try adding more flour a tablespoon at a time. Mix about a minute after adding flour. The dough that I ended up with was sticky and would leave dough on your fingers if touched. Do not make the dough too firm, otherwise you will not be able to stretch it out. Make sure that you mix the dough for 4 – 5 minutes once it’s the right consistency. After the dough has been kneaded using the dough hook, transfer the dough to another bowl, sprinkling flour on one side, and put the floured side down. Brush the top with melted butter, then cover the bowl with a towel and set aside for about an hour. The amount of time kneading and the amount of time letting the dough rest helps make the dough workable.
While the dough is resting, use this time to prepare the strudel filling. You need between 3 – 4 pounds of apples that are peeled, cored, and sliced. For this many apples, I used an hand cranked apple peeler corer, which makes quick work of apples and produces slices that are a consistent thickness. I like to use this tool for making apple pie, apple sauce, and apple butter. Slice the apples, cover them, and set aside. It’s ok if the apples brown a little from sitting out, since they will brown when they are cooked. Next, you need about 1 to 1 1/2 cups of walnuts. The walnuts should be ground, and you can do this using a blender, a food processor, or even a grinder attachment for a KitchenAid. I have found that the grinder attachment, while a little slow, produces an almost light and airy ground nut. Any method of grinding should work. Lastly, you should have between 4 to 8 ounces of raisins and a cup of plain bread crumbs. Honestly, I kept all of these in separate containers and did not mix them.
After all of the filling items have been prepared, and the dough has rested for about an hour, take a CLEAN bed sheet (preferably a twin sheet) and spread it out on your work space. When I did this, I used my kitchen table which is roughly 3 Feet by 4 Feet. Believe me, this was JUST enough space to prepare the dough. Lay out the sheet and coat the sheet with a light dusting of flour. Believe it or not, the sheet will get clean in the washing machine.

Now comes the tricky part, and the part that actually made me nervous. Place the dough in the middle of your work space and gently roll it out until it’s about 1/2 inch thick. Gently rolling means taking the rolling pin and using only the weight of the pin (no extra pressure by pushing down) rolling it out. Once the dough is about 1/2 inch thick, you now need to stretch it by hand. I found that using one hand to lift the edge of the dough and putting the other hand beneath, you gently lift, stretch, and pull the dough toward the edge of the table. I slowly worked my way around the table slowly stretching the dough from the middle about 3 – 4 inches at a time. The goal is to get a majority of the dough so that you can see the color of the sheet through the dough. The thinner the better, but don’t make it too thin where the dough starts getting holes in it. I was amazed at how easily the dough stretched and how far it stretched.

Once the dough is stretched, gently brush the dough with melted butter (about 6 – 8 tablespoons). You want to get a fairly even layer of butter over the entire surface. Be careful not to accidentally tear or poke holes in the dough. Once the dough has been coated in melted butter, sprinkle white sugar evenly over the surface. I tried to sprinkle enough sugar that it stopped absorbing the butter. After the sugar is sprinkled evenly, sprinkle Cinnamon liberally over the dough.
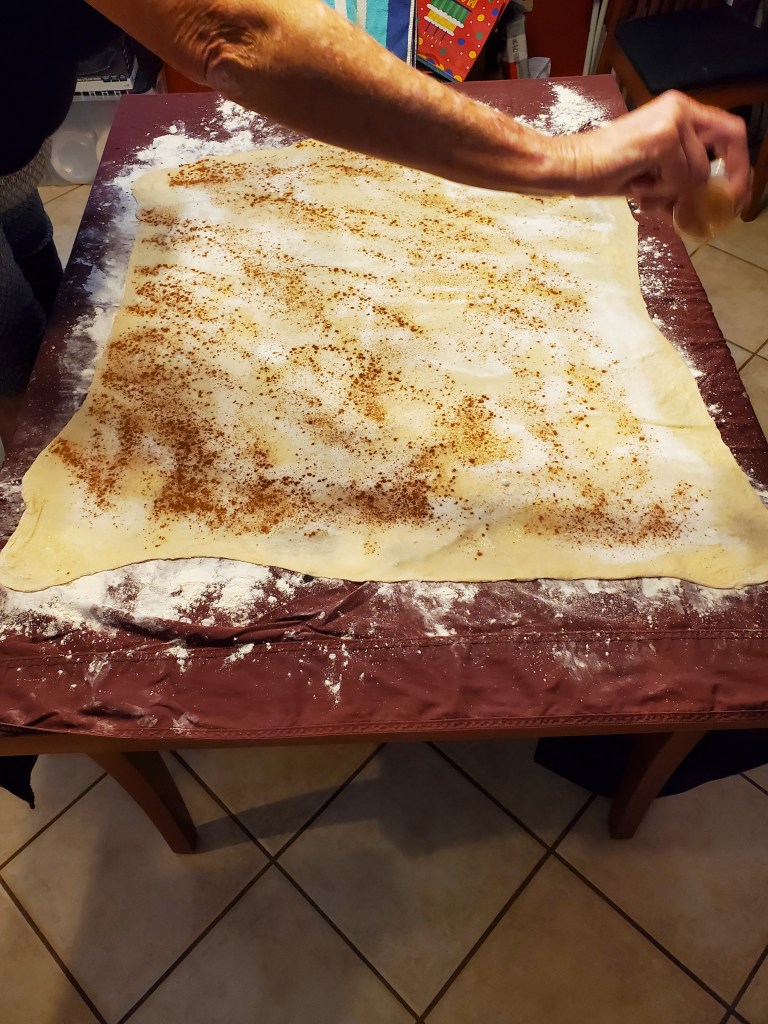
Now that the Butter, Sugar and Cinnamon coat the dough, evenly sprinkle the Ground Walnuts, then the Bread Crumbs, and then the Raisins across the dough. Leave 2 – 3 inches of one edge of the dough not coated. This edge will ultimately be the start of the rolling process. After all of the other filling items have been spread, spread out the apples in a fairly even layer about one apple slice thick. The following photos show the completed dough with filling and apples; the dough with filling without apples; and a close up of the dough with butter, sugar, cinnamon, walnuts, breadcrumbs, and raisins. Note the bottom edge doesn’t have anything on it.


Once you are happy with your filling, you start rolling the dough. You roll the dough by slowly lifting the edge of the sheet and pulling upward and toward the center of the dough. Surprisingly the dough rolls itself, just keep lifting the sheet upward and toward the opposite edge of the dough. Just be careful not to roll the dough off the edge of your workspace. The first picture below shows the dough starting to roll, and the second picture shows the the finished roll. If you have a pastry brush, you should gently brush the excess flour off of the completed roll.


Unless you have a super oven and an amazingly large baking pan, you are going to need to cut the roll into halves or thirds. Measure the length of you pans against the final roll and cut the roll appropriately. Do not worry about there being an open end of your strudel, it will be fine. I think the next time I make this recipe, I will try to leave the middle of the dough free of filling (about 2 – 3 inches), so that I can seal the edge. But, that’s me just trying to be a perfectionist. Having an open end actually works out.
Preheat the oven to 375 degrees. While the oven is warming up, move the strudels to baking pans, which are covered in parchment paper. I found that you are able to use the sheet to roll a strudel onto the baking pan by slowly lifting the sheet up. Position the strudel in the middle of the pan and brush the tops of the strudels with melted butter. After the oven reaches temperature, place the pans in the oven and bake for about 1 hour. I baked them for about 40 minutes, then switched the pans from upper and lower racks to even the browning. Once switched, watch closely to make sure the strudels don’t get over cooked (Golden Brown vs. Dark Brown). Once you are happy with the color, remove the strudels, and you are pretty much done. In the pictured below, you have one strudel coated in melted butter before baking. Note that the dough is so thin that you can see the raisins through the dough. The second picture is the finished strudel.


I have to admit that I was genuinely surprised at how well the strudel turned out on my first attempt. Honestly, I had never attempted working dough in this way and was happy at how easy the dough was to work with. I think the secret is having a soft and somewhat sticky dough, instead of a dry firm dough. Anyway, I am completely happy with the Apple Strudel and the taste. While it was a challenging recipe, I think that I will make this again, perhaps for a holiday party.
Feel free to comment and ask questions.

Cheers!
-Kappy

Looks good Jeffro. Arria likes the blog.
LikeLike